

Build a React application with a no-code backend (DoTenX) in 5 minutes


Today, being a front-end developer is enough to be able to build an entire application. You might ask how. It's simple, you can use DoTenX, an open-source no-code backend builder turning you into a super-developer!
In DoTenX you can easily do user management (sign in/ sign up), create database tables, workflows and even complex background workflows which are triggered based on different events. The interesting part is that you can do all of that without writing a single line of code!
Also, another interesting fact about DoTenX for all the open-source fans, is that DoTenX is open-source: github.com/dotenx/dotenx (We appreciate your support by adding stars to our project).
DoTenX is in pre-alpha version at the moment and at dotenx.com you can create a free account and try whatever I demonstrate in this tutorial along with me on your account.
In this post, we create a simple To-do list application that has three pages:
- Sign up
- Login
- Todos
The Todos page is a protected page, meaning you have to be already logged in to be able to visit the page.
In the next tutorials we'll continue this example to build more advanced applications.
Preparation
The first step is to create an account here.
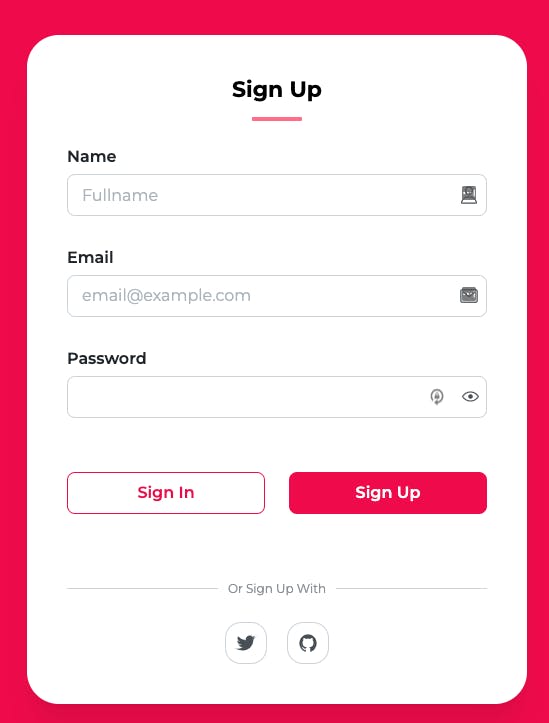
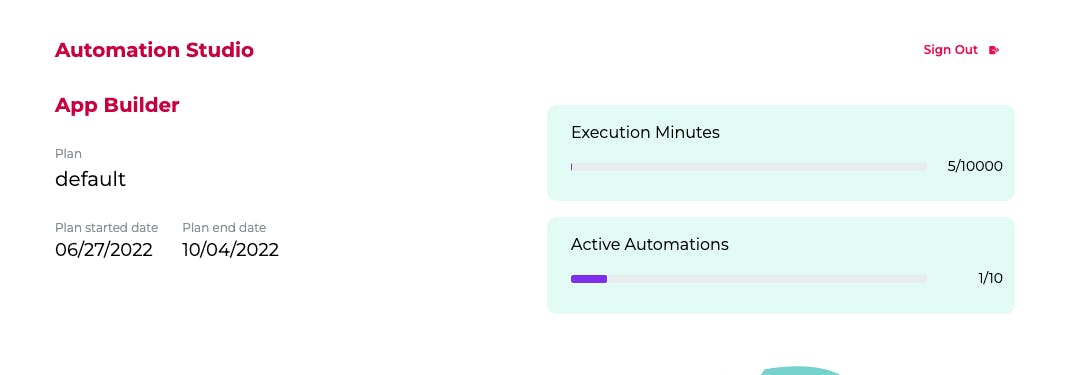
After you signed up, on your admin dashboard, click on App Builder.
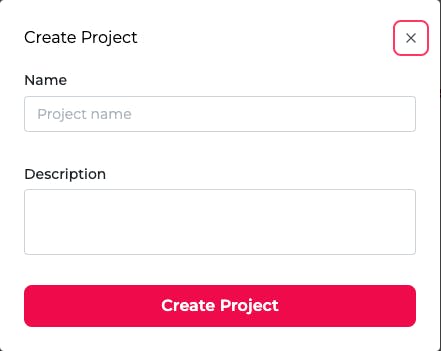
Now, we start by creating a project:
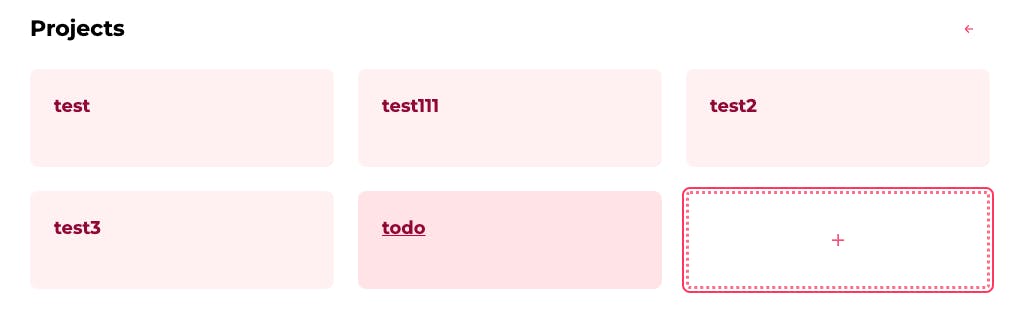
After creating the project, simply click on the project you just created to go to the Builder Studio.
Now we're ready to start building our application!
Let's create our React application with Vite:
npm create vite@latest
Following this command, we'll be asked about the name of the project and the framework. Make sure you use React as the framework.
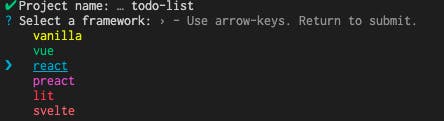
You can also optionally add tailwindcss to your project. You can find the instructions here. As a side note, you should skip the first step (creating the React application), as we already did it.
Routing
Let's st
npm i react-router-dom
Now we change App.jsx to look like this:
App.jsx
import "./App.css";
import { BrowserRouter, Route, Routes, Navigate } from "react-router-dom";

function App() {
  return (
    // Add the Router to the App component. It should have a Switch component inside it to handle the routes.
    <BrowserRouter>
      <Routes>
        <Route path="/signup" element={<SignUp />}></Route>
        <Route path="/login" element={<Login />}></Route>
        <Route path="/todos" element={<Todos />}></Route>
      </Routes>
    </BrowserRouter>
  );
}

function SignUp() {
  return (
    <div>SignUp</div>
  );
}

function Login() {
  return (
    <div>Login</div>
  );
}

function Todos() {
  return (
    <div>Todos</div>
  );
}

export default App;
We'll then start creating each of the pages and finally we'll update the routes to make sure the users have to be logged in to be able to visit the /todos route.
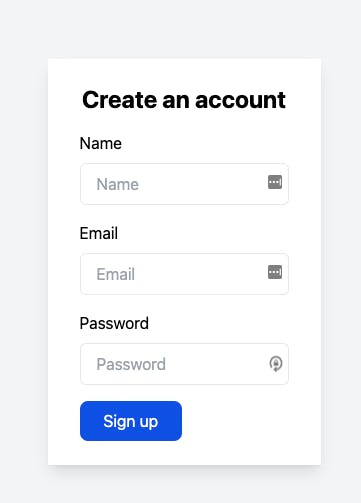
Sign up
Let's add a simple form for our sing up page:
SignUp.jsx
import { useState } from "react";
import { useNavigate } from "react-router-dom";
import authService from "./auth.service";

function SignUp() {
  const navigate = useNavigate();

  // Add the SignUp form
  const [form, setForm] = useState({
    email: "",
    password: "",
  });
  const handleChange = (e) => {
    setForm({ ...form, [e.target.name]: e.target.value });
  };
  const handleSubmit = async (e) => {
    e.preventDefault();
    try {
      await authService().register(form.fullname, form.email, form.password);
      alert("Successfully signed up");
      navigate("/login");
    } catch (error) {
      alert(error.message);
    }
  };
  return (
    <div class="flex items-center justify-center min-h-screen bg-gray-100">
      <div class="px-8 py-6 mt-4 text-left bg-white shadow-lg">
        <h3 class="text-2xl font-bold text-center">Create an account</h3>
        <form onSubmit={handleSubmit}>
          <div class="mt-4">
            <div>
              <label class="block" for="fullname">
                Name
              </label>
              <input
                type="text"
                placeholder="Name"
                name="fullname"
                onChange={handleChange}
                className="w-full px-4 py-2 mt-2 border rounded-md focus:outline-none focus:ring-1 focus:ring-blue-600"
              ></input>
            </div>
          </div>
          <div class="mt-4">
            <div>
              <label class="block" for="email">
                Email
              </label>
              <input
                type="text"
                placeholder="Email"
                name="email"
                onChange={handleChange}
                className="w-full px-4 py-2 mt-2 border rounded-md focus:outline-none focus:ring-1 focus:ring-blue-600"
              ></input>
            </div>
            <div class="mt-4">
              <label class="block">Password</label>
              <input
                type="password"
                placeholder="Password"
                name="password"
                onChange={handleChange}
                className="w-full px-4 py-2 mt-2 border rounded-md focus:outline-none focus:ring-1 focus:ring-blue-600"
              ></input>
            </div>
            <div class="flex items-baseline justify-between">
              <button class="px-6 py-2 mt-4 text-white bg-blue-600 rounded-lg hover:bg-blue-900">
                Sign up
              </button>
            </div>
          </div>
        </form>
      </div>
    </div>
  );
}

export default SignUp;
Nothing special about this page other than this part:
await authService().register(form.fullname, form.email, form.password);
I have created a simple helper function that takes care of the authentication part:
auth.service.js
import axios from "axios";

function authService() {

  const register = async (fullname, email, password) => {
    try {
      await axios.post(
        "https://api.dotenx.com/user/management/project/noelOND7MdGyoUDU/register",
        {
          fullname,
          email,
          password,
        }
      );
    } catch (error) {
      throw new Error(`Failed to sign up: ${error.message}`);
    }
  };

  const login = async (email, password) => {
    try {
      const response = await axios.post(
        "https://api.dotenx.com/user/management/project/noelOND7MdGyoUDU/login",
        {
          email,
          password,
        }
      );

      localStorage.setItem("accessToken", response.data.accessToken);
      localStorage.setItem("expirationTime", response.data.expirationTime);
    } catch (error) {
      throw new Error(`Failed to log in: ${error.message}`);
    }
  };

  const logout = () => {
    localStorage.removeItem("accessToken");
    localStorage.removeItem("expirationTime");
  };

  const getToken = () => {
    return localStorage.getItem("accessToken");
  };

  const isLoggedIn = () => {
    return localStorage.getItem("accessToken") ? true : false;
    // TODO: check if the token is expired
  };

  return {
    register,
    login,
    logout,
    getToken,
    isLoggedIn,
  };
}

export default authService;
The most important parts of this authService are the two endpoints I have used for signup and login:
https://api.dotenx.com/user/management/project/noelOND7MdGyoUDU/register
https://api.dotenx.com/user/management/project/noelOND7MdGyoUDU/login
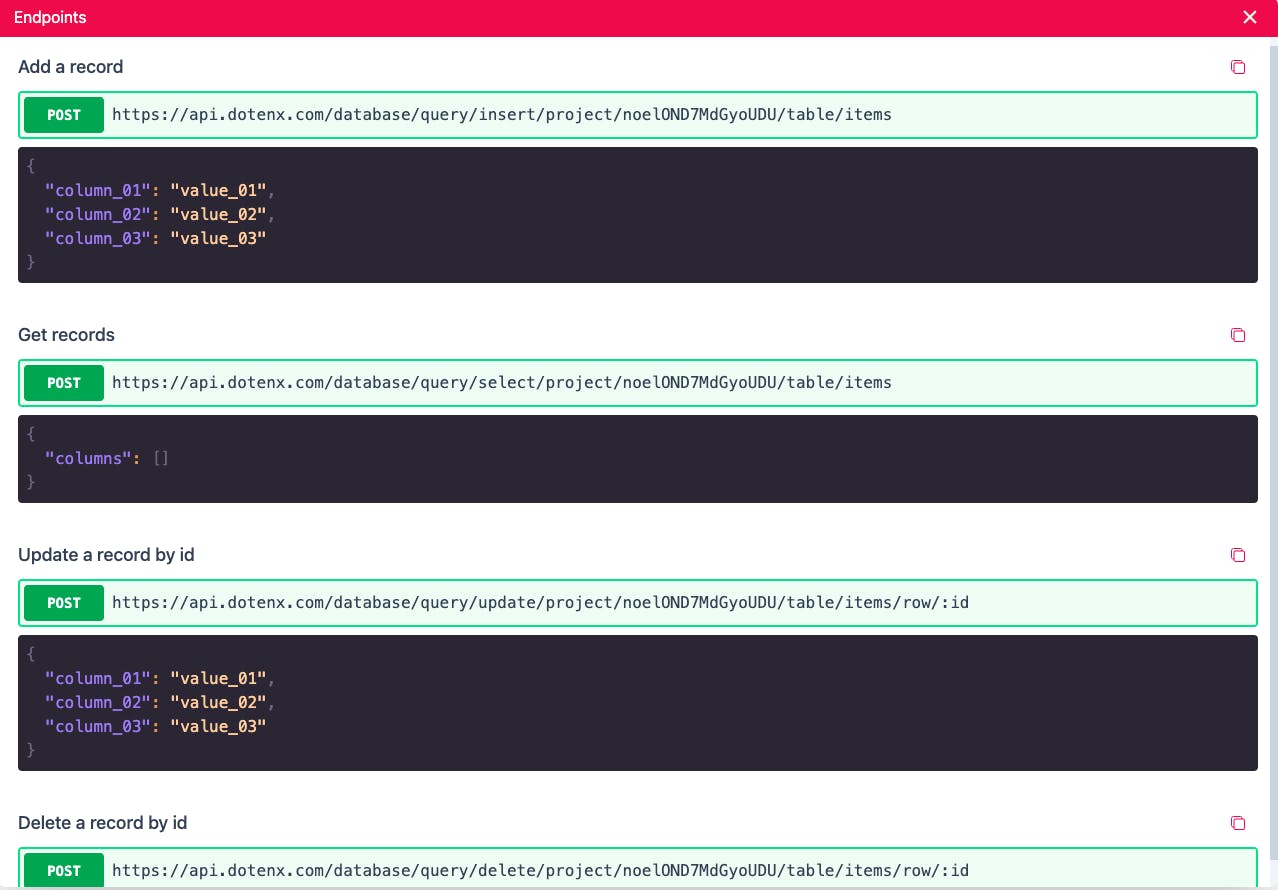
With DoTenX we don't need to write the backend code for sign in/up. These endpoints are already available for any project.
All we need to do is to go to the user management page and copy the endpoints:
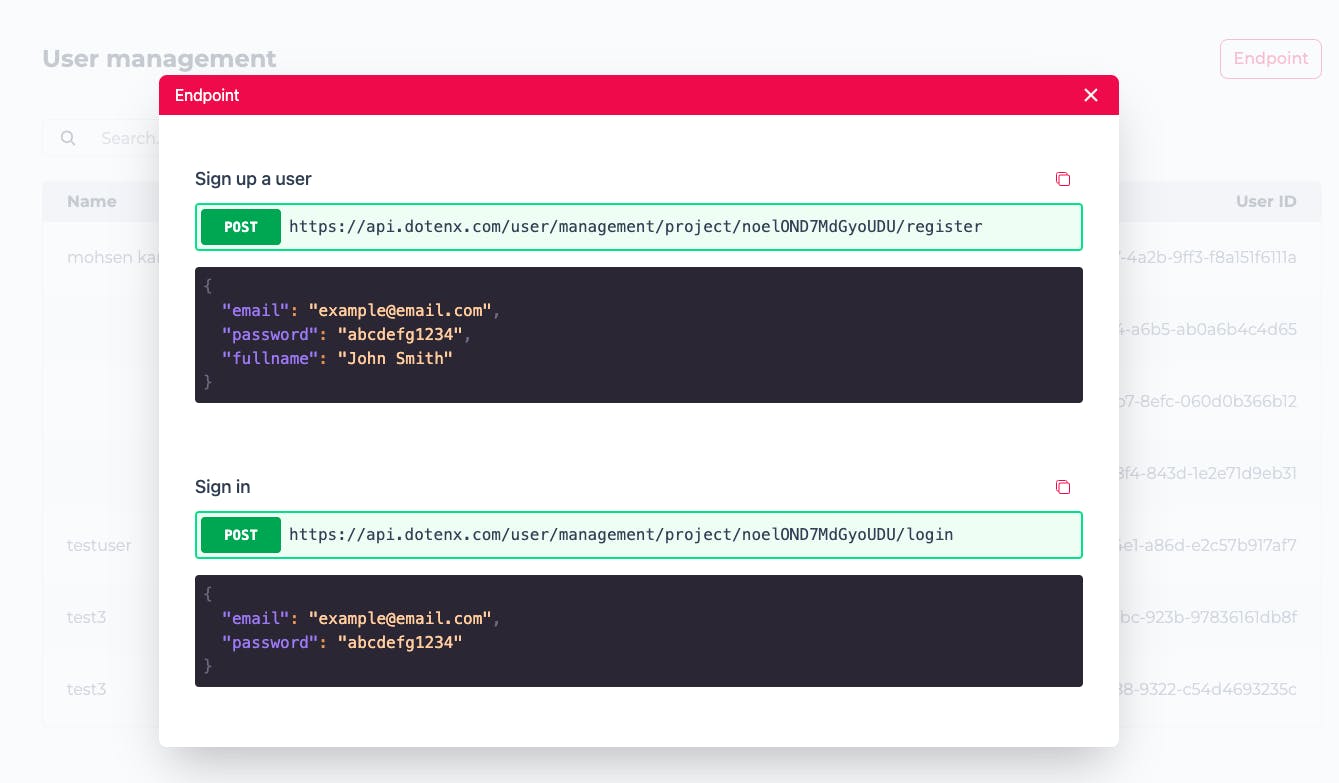
Here you can even see the body of the requests you have to send to sign in or sign up the users.
Login
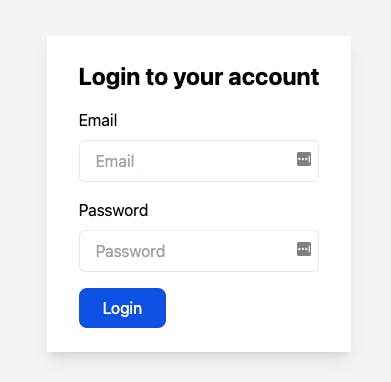
Now that our users can sign up on our website, let's add the login page.
Login.jsx
import { useState } from "react";
import { useNavigate } from "react-router-dom";
import authService from "./auth.service";

function Login() {
  const navigate = useNavigate();

  const [form, setForm] = useState({
    email: "",
    password: "",
  });
  const handleChange = (e) => {
    setForm({ ...form, [e.target.name]: e.target.value });
  };
  const handleSubmit = async (e) => {
    e.preventDefault();
    try {
      await authService().login(form.email, form.password);
      navigate("/todos");
    } catch (error) {
      alert(error.message);
    }
  };
  return (
    <div class="flex items-center justify-center min-h-screen bg-gray-100">
      <div class="px-8 py-6 mt-4 text-left bg-white shadow-lg">
        <h3 class="text-2xl font-bold text-center">Login to your account</h3>
        <form onSubmit={handleSubmit}>
          <div class="mt-4">
            <div>
              <label class="block" for="email">
                Email
              </label>
              <input
                type="text"
                placeholder="Email"
                name="email"
                onChange={handleChange}
                className="w-full px-4 py-2 mt-2 border rounded-md focus:outline-none focus:ring-1 focus:ring-blue-600"
              ></input>
            </div>
            <div class="mt-4">
              <label class="block">Password</label>
              <input
                type="password"
                placeholder="Password"
                name="password"
                onChange={handleChange}
                className="w-full px-4 py-2 mt-2 border rounded-md focus:outline-none focus:ring-1 focus:ring-blue-600"
              ></input>
            </div>
            <div class="flex items-baseline justify-between">
              <button class="px-6 py-2 mt-4 text-white bg-blue-600 rounded-lg hover:bg-blue-900">
                Login
              </button>
            </div>
          </div>
        </form>
      </div>
    </div>
  );
}

export default Login;
Notice that the response to the login request returns a JWT token that we can use to send other requests to our no-code backend on DoTenX that require a valid authorization token.
Todos
Finally we add the page where we show a list of to-do items, each item's state can be set to done, we can add new to-do items and delete them.
Before creating the page, we create a table in our DoTenX project:
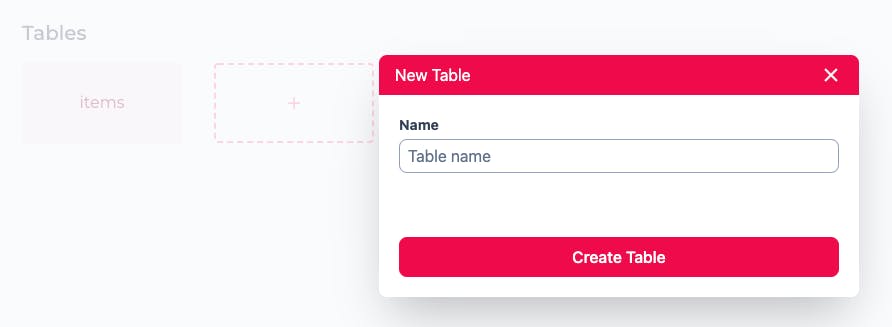
In our table we add the following columns:
- title:
Short text - start:
Date time - description:
Long text - deadline:
Date time - is_done:
Yes/No

Again, you don't need any SQL queries or external database. Every project on DoTenX, by default, has a database.
Also, we don't need to write SQL queries for CRUD. Each table has various endpoints next to it that we can use for CRUD operations.
That's all we need to be able to create our Todos page:
Todos.jsx
import axios from "axios";
import { useEffect, useState } from "react";
import { useNavigate } from "react-router-dom";
import authService from "./auth.service";

function Todos() {

  const [todos, setTodos] = useState([]);
  const navigate = useNavigate();

  useEffect(() => {
    fetchTodos();
  }, []);

  const fetchTodos = async () => {
    const res = await axios.post(
      "https://api.dotenx.com/database/query/select/project/noelOND7MdGyoUDU/table/items",
      {
        columns: [],
      },
      {
        headers: {
          "Content-Type": "application/json",
          Authorization: `Bearer ${authService().getToken()}`,
        },
      }
    );
    setTodos(res.data);
  };


  return (
    <div>
      <div>
        <h1 className="text-3xl mb-8">Todos</h1>
        <button
          className="bg-blue-500 hover:bg-blue-700 text-white font-bold py-2 px-4 rounded mb-6"
          onClick={() => {
            authService().logout();
            navigate("/login");
          }}
        >
          Logout
        </button>

      </div>

      <Modal fetch={fetchTodos} />

      <table className="table-auto">
        <thead>
          <tr>
            <th className="border px-4 py-2">Title</th>
            <th className="border px-4 py-2">Start</th>
            <th className="border px-4 py-2">Description</th>
            <th className="border px-4 py-2">Deadline</th>
            <th className="border px-4 py-2">Is Done</th>
            <th className="border px-4 py-2">Actions</th>
          </tr>
        </thead>
        <tbody>
          {todos.map((todo) => (
            <tr key={todo.id}>
              <td className="border px-4 py-2">{todo.title}</td>
              <td className="border px-4 py-2">{todo.start}</td>
              <td className="border px-4 py-2">{todo.description}</td>
              <td className="border px-4 py-2">{todo.deadline}</td>
              <td className="border px-4 py-2">
                {todo.is_done ? "Yes" : "No"}
              </td>
              <td className="border px-4 py-2">
                <button
                  className="bg-green-500 hover:bg-blue-700 text-white font-bold py-2 px-4 rounded mb-6"
                  onClick={async () => {
                    await axios.post(
                      `https://api.dotenx.com/database/query/update/project/noelOND7MdGyoUDU/table/items/row/${todo.id}`,
                      {
                        is_done: "true",
                      },
                      {
                        headers: {
                          "Content-Type": "application/json",
                          Authorization: `Bearer ${authService().getToken()}`,
                        },
                      }
                    );
                    await fetchTodos();
                  }}
                >
                  Done
                </button>
                <button
                  className="bg-red-500 hover:bg-blue-700 text-white font-bold py-2 px-4 rounded mb-6"
                  onClick={async () => {
                    await axios.post(
                      `https://api.dotenx.com/database/query/delete/project/noelOND7MdGyoUDU/table/items/row/${todo.id}`,
                      {},
                      {
                        headers: {
                          "Content-Type": "application/json",
                          Authorization: `Bearer ${authService().getToken()}`,
                        },
                      }
                    );
                    await fetchTodos();
                  }}
                >
                  Delete
                </button>
              </td>
            </tr>
          ))}
        </tbody>
      </table>
    </div>
  );
}

function Modal({ fetch }) {
  const [showModal, setShowModal] = useState(false);

  const [form, setForm] = useState({
    title: "",
    start: "",
    description: "",
    deadline: "",
    is_done: "false",
  });
  const handleChange = (e) => {
    setForm({ ...form, [e.target.name]: e.target.value });
  };
  const handleSubmit = async (e) => {
    e.preventDefault();
    try {
      await axios.post(
        "https://api.dotenx.com/database/query/insert/project/noelOND7MdGyoUDU/table/items",
        form,
        {
          headers: {
            "Content-Type": "application/json",
            Authorization: `Bearer ${authService().getToken()}`,
          },
        }
      );
      fetch();
      alert("Successfully added todo");
      setShowModal(false);
    } catch (error) {
      alert(error.message);
    }
  };

  return (
    <>
      <button
        className="bg-red-600 text-white active:bg-red-500 font-bold uppercase text-sm px-6 py-3 rounded shadow hover:shadow-lg outline-none focus:outline-none mr-1 mb-1 ease-linear transition-all duration-150"
        type="button"
        onClick={() => setShowModal(true)}
      >
        Add Todo
      </button>
      {showModal ? (
        <>
          <div className="justify-center items-center flex overflow-x-hidden overflow-y-auto fixed inset-0 z-50 outline-none focus:outline-none">
            <div className="relative w-auto my-6 mx-auto max-w-3xl">
              <div className="border-0 rounded-lg shadow-lg relative flex flex-col w-full bg-white outline-none focus:outline-none">
                <div className="flex items-start justify-between p-5 border-b border-solid border-slate-200 rounded-t">
                  <h3 className="text-3xl font-semibold">Add a new todo</h3>
                  <button
                    className="p-1 ml-auto bg-transparent border-0 text-black opacity-5 float-right text-3xl leading-none font-semibold outline-none focus:outline-none"
                    onClick={() => setShowModal(false)}
                  >
                    <span className="bg-transparent text-black opacity-5 h-6 w-6 text-2xl block outline-none focus:outline-none">
                      ×
                    </span>
                  </button>
                </div>
                <div className="relative p-6 flex-auto">
                  <form onSubmit={handleSubmit}>
                    <div class="mb-6">
                      <label
                        for="title"
                        class="block mb-2 text-sm font-medium text-gray-900 dark:text-gray-300"
                      >
                        Title
                      </label>
                      <input
                        onChange={handleChange}
                        type="title"
                        name="title"
                        class="bg-gray-50 border border-gray-300 text-gray-900 text-sm rounded-lg focus:ring-blue-500 focus:border-blue-500 block w-full p-2.5 dark:bg-gray-700 dark:border-gray-600 dark:placeholder-gray-400 dark:text-white dark:focus:ring-blue-500 dark:focus:border-blue-500"
                        placeholder="title"
                        required
                      ></input>
                    </div>
                    <div class="mb-6">
                      <label
                        for="description"
                        class="block mb-2 text-sm font-medium text-gray-900 dark:text-gray-300"
                      >
                        Description
                      </label>
                      <input
                        onChange={handleChange}
                        type="description"
                        name="description"
                        class="bg-gray-50 border border-gray-300 text-gray-900 text-sm rounded-lg focus:ring-blue-500 focus:border-blue-500 block w-full p-2.5 dark:bg-gray-700 dark:border-gray-600 dark:placeholder-gray-400 dark:text-white dark:focus:ring-blue-500 dark:focus:border-blue-500"
                        placeholder="description"
                        required
                      ></input>
                    </div>
                    <div class="mb-6">
                      <label
                        for="start"
                        class="block mb-2 text-sm font-medium text-gray-900 dark:text-gray-300"
                      >
                        Start
                      </label>
                      <input
                        onChange={handleChange}
                        type="date"
                        name="start"
                        class="bg-gray-50 border border-gray-300 text-gray-900 text-sm rounded-lg focus:ring-blue-500 focus:border-blue-500 block w-full p-2.5 dark:bg-gray-700 dark:border-gray-600 dark:placeholder-gray-400 dark:text-white dark:focus:ring-blue-500 dark:focus:border-blue-500"
                        placeholder="start"
                        required
                      ></input>
                    </div>
                    <div class="mb-6">
                      <label
                        for="deadline"
                        class="block mb-2 text-sm font-medium text-gray-900 dark:text-gray-300"
                      >
                        Deadline
                      </label>
                      <input
                        onChange={handleChange}
                        type="date"
                        name="deadline"
                        class="bg-gray-50 border border-gray-300 text-gray-900 text-sm rounded-lg focus:ring-blue-500 focus:border-blue-500 block w-full p-2.5 dark:bg-gray-700 dark:border-gray-600 dark:placeholder-gray-400 dark:text-white dark:focus:ring-blue-500 dark:focus:border-blue-500"
                        placeholder="deadline"
                        required
                      ></input>
                    </div>
                    <div class="flex items-center justify-between">
                      <button
                        className="bg-red-600 text-white active:bg-red-500 font-bold uppercase text-sm px-6 py-3 rounded shadow hover:shadow-lg outline-none focus:outline-none mr-1 mb-1 ease-linear transition-all duration-150"
                        type="submit"
                      >
                        Add
                      </button>
                      <button
                        className="bg-gray-200 text-gray-900 active:bg-gray-400 font-bold uppercase text-sm px-6 py-3 rounded shadow hover:shadow-lg outline-none focus:outline-none mr-1 mb-1 ease-linear transition-all duration-150"
                        onClick={() => setShowModal(false)}
                      >
                        Cancel
                      </button>
                    </div>
                  </form>
                </div>
              </div>
            </div>
          </div>
          <div className="opacity-25 fixed inset-0 z-40 bg-black"></div>
        </>
      ) : null}
    </>
  );
}

export default Todos;
And this is how our page looks like:

Now that we have all the parts, we update the App.jsx like this:
App.jsx
import "./App.css";
import { BrowserRouter, Route, Routes, Navigate } from "react-router-dom";
import SignUp from "./SignUp";
import Login from "./Login";
import Todos from "./Todos";
import authService from "./auth.service";

function App() {
  return (
    <BrowserRouter>
      <Routes>
        <Route path="/signup" element={<SignUp />}></Route>
        <Route path="/login" element={<Login />}></Route>
        <Route
          path="/todos"
          element={
            <RequireAuth>
              <Todos />
            </RequireAuth>
          }
        ></Route>
      </Routes>
    </BrowserRouter>
  );
}

export function RequireAuth({ children }) {
  if (!authService().isLoggedIn()) {
    return <Navigate replace to="/login" />;
  }

  return <>{children}</>;
}

export default App;
I hope you liked what we did together in this tutorial and I've been able to show you how DoTenX can empower you to implement your ideas without worrying about many challenging parts related to the backend and infrastructure.
Finally, DoTenX is an open-source project and for us everything is about the community.
I invite you to join our Discord server and connect with our thriving community where you can find many like minded individuals who are using our platform, and leading the direction of the project by asking us what they want to see in the platform built for themselves.
You can find the source code of this project here: github.com/dotenx/react-todo-list